Do It Yourself
Showerdome DIY guide
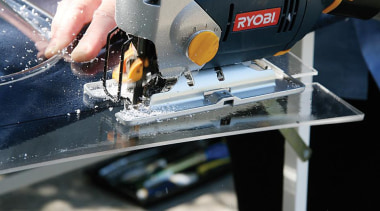
Showerdome DIY Step 9
First cut the two sides that sit in the “F” rails.Marks are made to guide the cutting with a non permanent felt pen.

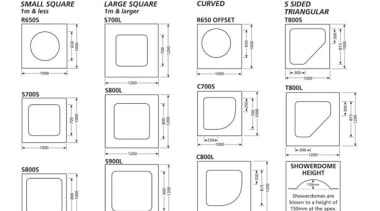
Showerdome Shapes 7 sizes
All Showerdomes are made on 'blanks' bigger than they need to be to allow for this custom fitting as each and every individual shower has unique measurements.

Showerdome DIY Step 10
Installers use either the jigsaw with a carbide blade, or a Linbide scouring tool.It will depend on the shape and size of the Showerdome being installed.

Showerdome DIY Step 2
For the best results, mitre the two lengths of “F” rail so that they meet in the corner.These are then cut so that they butt up against the shower frame.The tiles / liner should be cleaned thoroughly and allowed to dry.

Showerdome DIY Step 8
It is important to note that a minimum of 35mm of the flange material must remain from the Showerdome strengthening ridge on all sides of the Showerdome.This amount is required so the ridge doesn’t interfere when sliding the Showerdome into the “F” rails and so the ridge...


Showerdome DIY Step 15
Any sharp edges are then cleaned up with a scraper or sanding block, and the Showerdome is put into position.Although the Showerdome will not physically move unless pushed, we recommend securing the Showerdome with several small locating screws which are drilled into th...
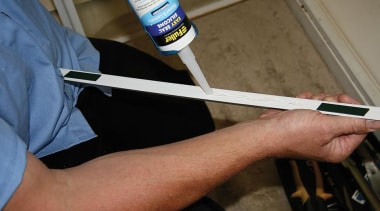
Showerdome DIY Step 4
A bead of bathroom grade clear sealant / adhesive is then run between the tape.Our installers use Holdfast MS All Crystal Clear 202 clear sealant.
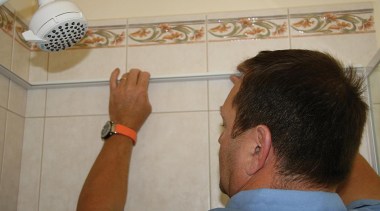
Showerdome DIY Step 5
The rails are then attached to the walls one at a time. Ensure that they are level and that the slots in the “F” rail are level with the top of the shower frame.

Showerdome DIY Step 6
Any small gaps where the rails meet should be filled with white bathroom silicon if necessary
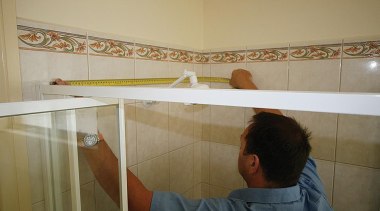
Showerdome DIY Step 1
Showerdome is manufactured from a high grade acrylic and can be easily damaged or cracked if not handled correctly.Measure from the inside corner where the tiles / liner meet, to the inside of the door frame.Then measure from the same corner to the inside of the glass wa...

Showerdome DIY Step 13
At this point, slide the Showerdome into position, and using a small stepladder, use a straight edge to mark the two sides that will now be overhanging the shower door and wall frames.


Showerdome DIY Step 14
It is important the Showerdome has sufficient framework to sit on.These two sides are then cut in the same way as the previous cuts.

Showerdome DIY Step 11
Using the jigsaw (with carbide blade), every 200mm cut back into the main cut line to reduce the weight of the material hanging from the cut.
Story by: Trendsideas
Home kitchen bathroom commercial design